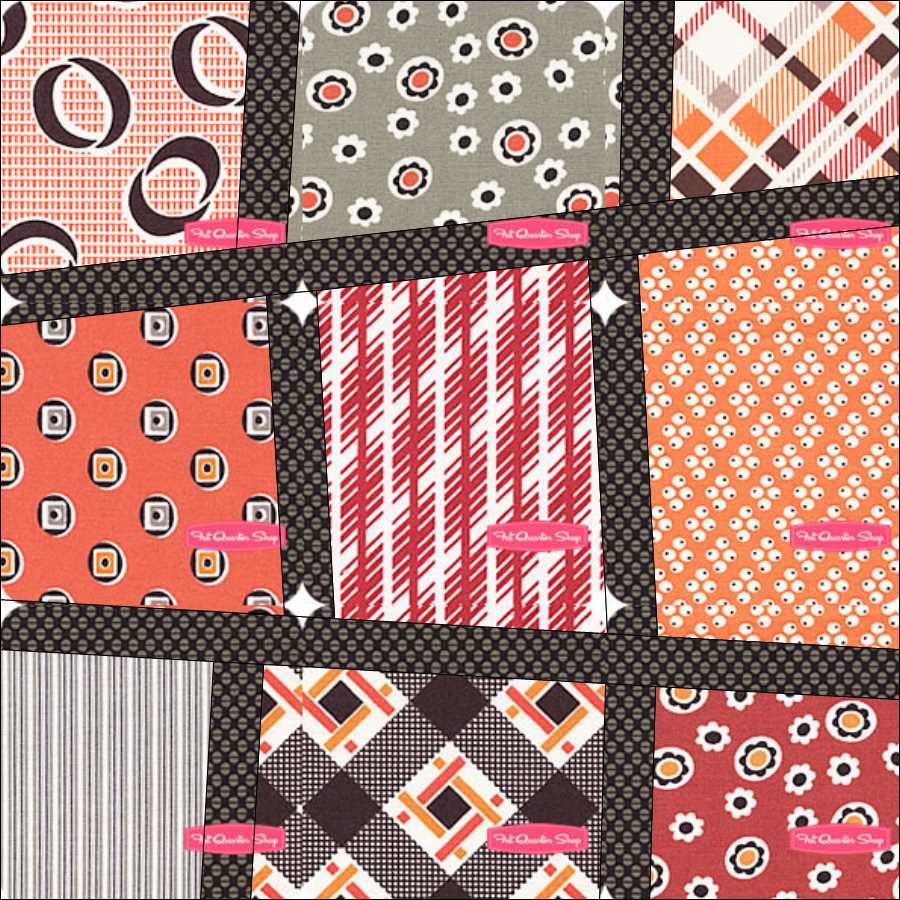
Wednesday, May 28, 2014

We Love Pam

One of my colleagues of many years is retiring. She will be sorely missed, and OF COURSE, whenever my group wants to express its concern, shared joy or any other emotion -- what do we do? We make a quilt. Pam loves cross-stitch so that was the theme. We also wanted to express our feeling. The design also had to let lots of people participate, allow some individual self-expression, and not require much skill. With a little quilt cross-stitch inspiration (see  http://blog.pileofabric.com/2014/03/06/cross-stitch-instagram-in-the-studio-2/ ), I 'googled' and looked at a lot of cross-stitched hearts.

Using EQ7, I came up with this design. Each unit in the grid is 2 1/2" finished and the whole quilt is about 40" x 45".
We <3 Pam
Originally, the center was filled in, but that would have required too many cross-stitch blocks. Pam's favorite colors are purple and teal so we assemble a pallette of choices. Final fabric choices and layout of completed components was a team effort. We gave contributors a choice of making cross-stitch blocks, or making fuse-on flowers that would be arranged 'artistically' in bunches on the background.

The cross-stitch blocks are also fused, not sewn. We held several group 'craft' opportunities in a conference room at work. Cross-stitchers got pre-cut background squares, and strips of fusible. They selected colors from a stash of fabrics, cut, fused, and layered and trimmed the squares. If I were going to do this again, I would recommend cutting the color strips on the bias to reduce fraying.
Components for 1 square
Alignment was easiest from be back


Trimming
Finished product


To assemble the top without chopping up the background into itty-bitty squares and sewing it all back together, I made a layout of larger pieces and a map, precut all the pieces, and sewed everything together.
.
.
Finished quilt -- picture is intentionally dark to show quilting texture.
Finally, the quilting -- each 'cross-stitch' was edged-stitched down with a Rainbow polyester. Flowers were edge stitched with a pale Invisifil. Leaves and stems were free-motion stitched with a dark green 30wt rayon, and the background was quilted with a pale off white Invisifil (wavy lines about 1/2" apart leaving words outlined but unquilted in the middle, and a free form feather inside the heart (spine was marked)). My collaborators are split on whether the lettering should stay subtle or be outlined in a darker thread to stand out more.

The binding is a really lovely batik/hand-dye-like railroaded stripe, sewn on the front, pulled to the back and tacked with Roxanne's GlueBaste, and then machine finished by couching down a variegated light-weight cotton yarn 'in the ditch' right next to the fold on the front. This is my new absolute favorite method for binding. Strips are cut 2 1/2". The folded strip is sewn on with a 5/16's" seam allowance (adjusted based on the thickness of the fabric to be able to fold to the back and cover the stitching line). I highly recommend a test run. I love how the couched yarn adds a defining line of color, like a very thin piping (but SO much easier), and sews down the binding on the back in one go.

Love hear what you think,
Susan


Saturday, March 22, 2014

Asilomar Robins Continue

We left off with the water in the bird bath. I made two versions and liked the second one with improvisationally pieced strips better.
Over the last week (I work VERY slowly) I've gone on to add the front edge of the bird bath and am now working on the background.The background is essentially all green with light coming from the top and left. Choosing what goes where is very intimidating for a novice like me, especially since the background is supposed to be sort of natural looking. I think this might be easier if the robins and bird bath in the foreground were pulled out and the background was completely different. That is what I did with my previous effort at this type of work (see eggplant).

I don't have the world's largest stash to work with, so I started by pinning little scraps up in places where I thought they might go.
Swatches pinned up to develop the shading.
Although this method is not perfect, it was a good way to get a feel for the shading without cutting entire pieces. In some cases I only have small scraps to work with and a mistake (i.e. cutting a piece and then deciding that the fabric would be better used for a different piece) would be bad. This was also good because I only get to work in short spurts (maybe an hour before bed). Pinning up the scraps was pretty quick and now I have a guide for what to do next.

I also realized that some of the pieces in my original drawing needed to be subdivided. In some cases, I've done that somewhat improvisationally by just folding the template back and sewing on another piece.


Background units made, but not fully assembled

Almost every piece has been 'fussy cut' to try to put light next to light and dark next to dark in order to reduce the appearance of the seams. I've made most of the units, but I haven't sewn them together. I'm still cogitating on some of the choices and can still make some changes pretty easily.

Now that I'm getting close to finishing I'm anxious to see how it comes out and to quilt it. 

All the Best,
Sue

Saturday, March 15, 2014

Asilomar Robins

This spring I finally got to attend Empty Spools at Asilomar in Pacific Grove California. Fabulous quilting teachers and classes aside -- what a cool place!

I signed up for a class with Ruth Powers. She does really beautiful 'picture' quilts. You start with a image -- maybe a photograph -- and turn it into a piece-able design. This is definitely NOT for making bed quilts or even lap quilts. This is ART. I have taken a class like this before but there is a lot to learn -- especially about colors, how to break the image up to get the right effect, and tricks to getting it put together.

Some of my fellow students were more experienced, and more ambitious. I chose to make something about 18x24", based on this picture of Robins at the birdbath outside my window. The picture is very fuzzy because it is blown up from a tiny piece of a bigger photo.

Although this is clearly a parent and baby robin, and I love the strong directional lighting, the curve of the birdbath and the reflection, when you get down to actually tracing lines, the picture leaves a lot to the imagination. I went to the week long class armed with a full size enlargement of the photo, and a bunch of robin pictures off the web to use for reference. I also went with a suitcase full of fabric, freezer paper and lots of other tools (rulers, colored pencils, sharpie markers, scissors, etc).

 The first major accomplishment, which took me nearly 2 days, was to create a tracing paper pattern and a freezer paper drawing (reversed) that gets cut up to make the templates for cutting fabrics and sewing everything together.
Freezer paper template -- marked, and numbered.
I took a picture, with my phone, of the freezer paper template, before cutting into it, thinking that it would be a nice reminder of the steps and that I would post the picture here. Thank goodness I did. It also proved VERY useful as a reference to figure out where things came from and where they needed to go back to.

By the end of the week I had the birds basically done. This is not exactly a speed piecing kind of project, and I had to redo one whole section because I didn't like how the colors looked.
End of class picture from Ruth showing finished birds and auditioning birdbath fabrics.
Since coming home, I've been (very slowly) working on the birdbath and the reflection.

Work in progress on the design wall at home.
Although I got some great Marcia Derse fabric for the water (sweet corn swirl), I realized that I didn't have what I needed for the reddish bird reflections. After ordering several possibilities from eQuilter, I found one that is not perfect but seems OK (front right below). In the process, I have nearly used up my fat quarter of 'sweet corn swirl' and turned several other nice pieces of fabric into swiss cheese.
Fabrics for the birdbath water (and rejects)

I have made the water section twice -- once using the original design, and second time using more improvisational piecing to make strips that I sewed together to make a small piece of 'fabric' that I then used to cut out the whole section.
First water version, original pieced design

Second water version, improvisationally pieced


You be the judge, but I'm liking the second one. Next steps  will be to move on to the edge of the bird bath and then the background. I may do some more improvisational 'fabric' construction for parts of the background.

All the best,
Susan

Friday, January 31, 2014

Hands all around

This will be quick, because it was quick. A long-time co-worker retired this week. About 2 weeks ago we got the idea to make a quilt featuring the hands of people she has worked with. In the space of 14 days we collected tracings of 70 people's hands on prefused fabric, arranged everything on the background, ironed in place, free-motion quilted around every single hand, bound it (with a really nice couched on black chenille cord), made a label with everyone's name, and presented it (yesterday). In the spirit of doing it and not worrying about perfect, there was NO ripping out for small bobbles off the line. One slightly noticeable booboo got inked over with white permanent ink.

Hands of the Breast Center: Giving Life to Possible
I guess many hands make light work.

Susan

Tuesday, December 31, 2013

Sisters

My final production for the year of 2013 is a small baby quilt called "Sisters".

Partly as a personal challenge, and partly because it seemed a good way to get a wide selection of batiks in tan, pink purple and brown (the desired color scheme), the quilt top is made entirely from 10 inch squares from two Tonga Treats layer cakes. The light tans were used for the background squares and sliced up to make a piano key border, the pinks and purples were used for the bunnies, and some nice chocolate browns were used for the 1 1/2 inch sashing and corner stones (all very simple and traditional).


The snoozing bunny image comes from Darcy Ashton (she has the cutest drawings of bunnies, dogs, etc). I made a plastic template and then used it to trace 18 bunnies. I used a stencil cutter to make slots for later marking of outline stitching and embroidery lines.


I cut out 9 purple bunnies (3 from each of 3 fabrics) and 9 pink bunnies (also 3 from 3) and then paired up each pink with each purple (i.e. pink1 with purple1, pink1 with purple 2, pink 1 with purple 3, pink 2 with purple1, etc) to get 9 pairs.


I laid out the background squares to get the arrangement and positioned the bunnies so that every block is a little different. Sometimes the sisters are snuggled close, sometimes they are further apart but still in concord, sometimes pink is in front and sometimes they are facing in opposite directions. I wanted this quilt to be soft and usable, so instead of fusing, I glue basted around the edges and then free motion start stitched twice around, just inside the raw edge (with tear-away stabilizer underneath. The raw edges are a little frayed, and there is a slightly rustic feel. I used a 12 wt cotton thread to embroider the bunny's noses and eyes before trimming the squares to 9 1/2 inches for assembly.


Assembly was very simple -- I presashed the squares and then sewed the inner top together.

The borders were made by slicing each of the remaining background squares into 3 vertical strips (some narrower than others), sewing all the strips back together along the long edges into one long piano key strip, and then sewing the ends of the strip together to get a big loop. This was cut down the middle to get two loops about 96 inches around and 5 inches wide. Like in bargello quilts, the loop allowed me to decide to start the border in different places and adds diversity. Each half loop made enough for two border strips, and the remaining 10 inch square of corner stone fabric was cut into 4 squares for the outer corner stones.


Quilting was simple and not too dense. I quilted in the ditch along both sides of all the sashing, free motion quilted around the outside of the bunnies, and then loosely filled the background. Each square uses adiffernt filler. In a couple of cases I just followed the batik pattern. The border was done in a big free motion feather that turns the corner and goes all the way around. It adds texture but only shows on the lighter, plainer fabrics.


The binding is a Marcia Derse fabric (I have a bunch but usually just look at it admiringly and pet it -- this is the first time I've cut into it). After sewing to the front, I used glue basting to tack it to the back and then stitched in the ditch on the front, just catching the edge on the back. Not as beautiful as hand sewing, but SOOO much faster, and actually looks pretty good.

This quilt is a present for the woman who has given me great haircuts for the last nearly 10 years, and who also used to cut my father's hair during the 4 years he lived with me and my husband. She was wonderful to him, and now she is having a baby and this is an opportunity to say 'Thanks'.

Thanks for reading and best wishes for the New Year -- which is now....


Sunday, November 24, 2013

Tuscan Nines

The International Quilt Festival in Houston is always a great time to see and do and learn quilty things. Living in Houston, I try to take full advantage. I take off work, and take a bunch of classes. I usually focus on getting a taste of new skills and techniques that may or may not make their way into my regular toolbox, but I also like a class or two that is relatively low stress and just for fun.

This year, I took a really fun class with Lynda Faires called "Crazy Nines". You basically start with largish squares (10" is a nice manageable size) of 9 different but compatible fabrics and you end up with 9 blocks of about the same size as the original. Each square is a wonky 9 patch, with 1/2" sashing strips and contains each of the nine fabrics.

Block mocked up in EQ7 and colored using JPEGS of fabrics

Back of the real thing. Note that the sashing adds back the seam allowances, so things fit together and end up about the same size as the original.
For final assembly, the blocks are trimmed to square-up. Mine went from 10" squares of fabric to 9.5" finished squared up blocks. These are sashed together to assemble the whole top.
Top mocked up in EQ7.
I like mocking things up in EQ7, just to get a feel for how it might look and to try to get fabrics and contrast about right. I didn't bother to make each block unique, the way it will be in the real thing. The JPEGS from the online fabric store include the store's logo, which I did not bother to photoshop out. I do usually add an extra very narrow outer border, so I can see what the binding might look like. The real thing always looks better.
Finished top before layering and quilting.
The class was 3 hours (including some explanation time), and by the end, I had all the blocks made. Now that I know how its done, I could probably do it a little faster. I cut all the sashing strips ahead of time, and it took about 5 hours to sew everything together. The top is definitely something you could put together in 1 long day, if you really worked at it. Finished quilt will be about 40" by 40".

There are lots of possible options for fabrics. One of the other students in the class used a gorgeous collection of Marcia Derse fabrics. I don't normally make a whole quilt from fabrics from a single line or designer, but for this project, going with a collection seemed like a quick and low stress way to get a nice selection. Layer-cakes are perfect for this type of quilt. I bought one layer-cake of Denyse Schmidt's "Florence" and separated it into orange and turquoise colorways. I've made the orange version and I have enough "layers" left to make a second turquoise version.

Left-over turquoise/green "layers" of the cake will be enough to make a second quilt.
I bought yardage for the sashing strips, outer border, back and binding. The fabric is very busy, so quilting will be very simple -- in the ditch and maybe a freeform feather (a la Philippa Naylor) in the border. I don't have an intended recipient for this quilt yet, but I want it to be soft and usable.

Thanks for reading (comments welcome) and Best Wishes for the Holidays,
Susan

Addendum -- finished quilting and binding. I used BottomLine in the bobbin. First, I tried Invisifil, which is very thin and nearly invisible but softer than monopoly, but kept getting snags and breaks -- especially with free motion. When my frustration meter max'ed out at "EXTREME -- ready to throw something heavy!", I switched to a neutral shade of BottomLine to blend into the top and finished with no further problems. The binding is a cute orange pin-stripe, just like in the mock up. I used my new favorite technique -- glue basting the folded edge to the back (just past the stitching line) and then stitching in the ditch on the front which catches about 1/6-1/8 inch of the fold on the back. This is not as beautiful as hand finishing, but looks quite nice if you take you time on the glue basting and is very fast.

Cheers,
Susan

Friday, July 12, 2013

Graduate Student Art Show time again

It is BCM Graduate Student Art Show time again -- time to donate a few things to the silent auction and help the students raise a little money for Texas Children's Hospital. This will be be third year I've contributed something. It is clear I don't know what people will be willing to pay money for. Things I think are cool don't sell and things I was less excited about seem more popular.

This year I have 3 little things to contribute -- two class project left-overs from the IQF Houston, and one brand new quickie.

The first left-over looking for a home was a Tsukineko painted beetle from a class with Judith Coates-Perez. The class was great and I was amazed at how the beetle (based on a Dover copyright free image) turned out, but then "What to do with it???"

Here is what I came up with. I added a batik border, like a picture frame, quilted around the beetle with very thin, nearly invisible thread, and then drew in fairly crude leaves with a chalk pencil and quilted with a nice green shiny rayon. There is feather quilting in the border, but it doesn't show much. Binding matches the backing, but is done in the usual way. Batting is two layers of a thin cotton -- the result is fairly stiff, which is nice for a wall piece, but was hard to sew through. It looks OK, but seemed to need something. One of my signature finishes is to couch thick Perl cotton along a seam or along the binding. I think the extra definition is a big improvement.
Quilted and bound

Black Perl cotton couched on, 9"x10"
 Now for the second left-over. This one is really old. I took a class on precision piecing with Sally Collins and one of the class exercises was to make a small Lemoyne Star using templates and Y-seams. It was very educational -- I learned I could do it and could probably get good at it with more practice, and I learned that maybe I didn't want to be good at it. In any event, I was left with 1 orphan, relatively precisely pieced Lemoyne Star. The fabric choices, which were based on what I happened to bring to the class, were somewhat unfortunate, and not good for showing off all the hard work of matching the points etc. You can hardly see the diamonds that make the star. I thought this might make a nice "Mug Rug" (a term I was unfamiliar with until recently), and that this might be a good opportunity to experiment with shifting the color one sees in a block with quilting and thread. Here is the original, unquilted block.
Original unquilted block

Red feathers added in half the star points

Yellow cross-hatching added on the other points
 The red and yellow rayon threads have some effect, and do improve the star's definition, but not as much as I hoped. Even denser quilting would probably have done more, but I used a double thickness of batting here too, and had a lot of trouble with threads shredding, so I decided not to push it. I used the same trick with Perl cotton around the edge to add a little more pizz-zazz. A darker salmon would probably have been even better, but my palette of available colors (I have a zip-lock bag of small skeins left-over from a previous needle-pointing life) is not unlimited.
Lemoyne Star Mug Rug -- 6"x6"

The final Art Show contribution is something that practically made itself. I recently got a couple of coffee themed batiks, and they just cried out for a free-cut cup and steam. The raw-edge cup and steam spirals were glue-basted on rather than fused, just to tack them down, and then stitched down in a sketchy free motion manner (see also And-then-there-were-two ). I used free motion quilting around the cup and in the background. It is subtle (maybe too subtle -- that is one of my problems), but the chemical symbol for caffeine is quilted onto the coffee cup. Hopefully some scientist browsing the Art Show will notice and think that is cool.

The border is actually the binding. It was cut 3" wide, folded, sewn on from the back with a 1/4" seam allowance, and then brought to the front. The mitering is done exactly as you would normally, and works beautifully. I glue-basted the folded edge down on the front, and then used a big blanket stitch with a heavy thread to stitch it down. The Perl cotton (dark brown) is the final touch.
Coffee Cup Mug Rug -- 8"x8"
As always, the fun is in the doing... Have fun and thanks for reading.

Susan

Update: Everything sold (Yippee), and there was a tiny bidding war on the bug.